Introduction
When I first started learning photography, ISO in photography was one of the settings that took me the longest to properly understand.
At first, it just seemed like a random number on the camera that changed how bright the image looked. It wasn’t until I started shooting in different lighting conditions that it finally made sense.
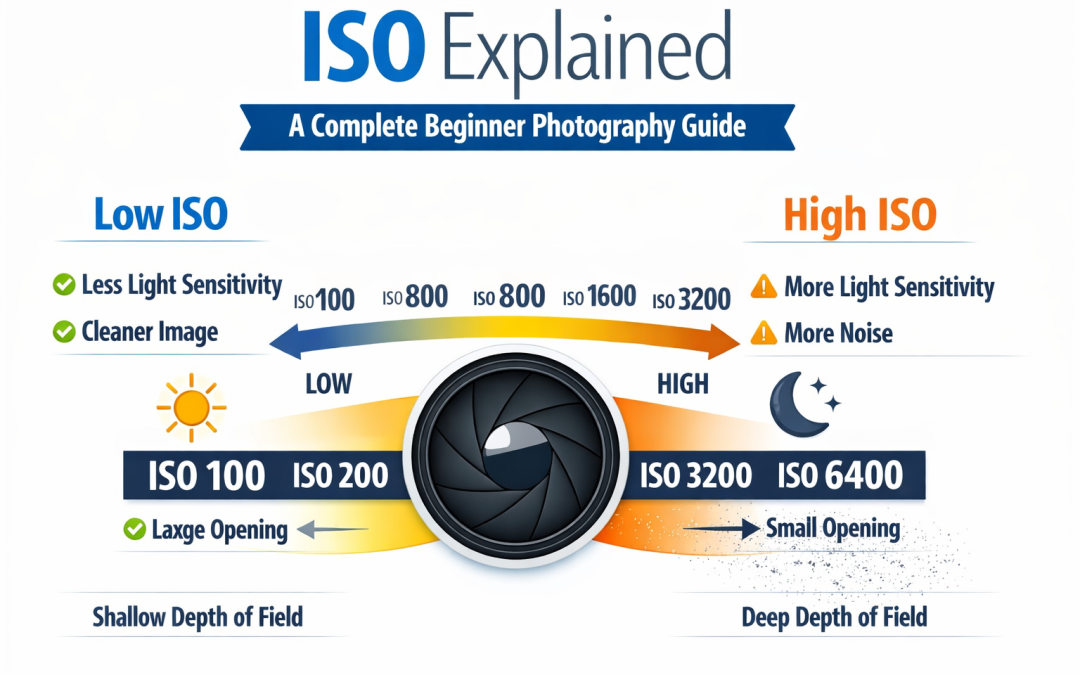
In simple terms, ISO controls how sensitive your camera is to light. Because of that, it directly affects both the brightness of your image and the amount of noise or grain you see.
If you’re learning photography, ISO works closely with aperture in photography and shutter speed. since all three settings form the exposure triangle.
What is ISO in Photography?
ISO refers to how sensitive your camera sensor is to light.
You can think of it as a way of telling your camera how hard to “work” in low light situations.
ISO values typically look like this:
- ISO 100
- ISO 200
- ISO 400
- ISO 800
- ISO 1600
- ISO 3200 and higher
Lower ISO values are used in bright conditions, while higher ISO values are used when there isn’t much light available.
How ISO in Photography Affects Your Images
ISO mainly affects two things: brightness and image quality.
Brightness
Increasing ISO makes your image brighter without changing your aperture or shutter speed.
This is useful when you don’t have enough light but still need a properly exposed photo.
However, it’s always a balance because ISO is not a “free” adjustment.
Image Quality (Noise)
The higher you push your ISO, the more noise or grain you will see in your image.
This usually becomes more noticeable in darker areas of the photo.
That’s why photographers try to keep ISO as low as possible when conditions allow.
When to Use Low ISO in Photography
Low ISO is always the starting point when you have enough light.
It produces the cleanest and sharpest image quality.
Typical situations include:
- bright daylight
- outdoor photography
- landscapes
- studio lighting
In these situations, there is no need to increase ISO unnecessarily.
When to Use High ISO in Photography
High ISO becomes useful when light is limited.
For example:
- indoor photography
- night scenes
- concerts or events
- fast-moving subjects in low light
In these situations, getting the shot is more important than having a perfectly clean image.
ISO and the Exposure Triangle
ISO is part of the exposure triangle, along with aperture in photography and shutter speed.
These three settings always work together to create a balanced exposure.
For example:
- If you use a fast shutter speed, your image may become darker, so you may need higher ISO
- If you use a small aperture, you may also need to increase ISO
- If lighting is strong, you can keep ISO low
If you want to understand how everything connects, I’ve covered it in more detail in the exposure triangle guide.
Common Beginner Mistakes with ISO in Photography
One of the most common mistakes is leaving ISO on auto and never understanding what it’s doing.
While auto ISO can be useful, it’s important to understand how it affects your images.
Another mistake is using high ISO even when there is enough light, which reduces image quality for no reason.
Finally, beginners often confuse noise with poor focus or sharpness, when it is actually caused by ISO settings.
ISO in Photography for Real Shooting Situations
Here’s a simple guide you can use as a starting point:
- Bright daylight → ISO 100–200
- Cloudy conditions → ISO 200–400
- Indoor photography → ISO 400–1600
- Low light / night → ISO 1600+
These are not strict rules, but they help build consistency while learning.
Final Thoughts
ISO in photography is one of the simplest settings to understand once it clicks, but also one of the most important for getting consistent results.
When you understand how it works alongside aperture in photography and shutter speed, you gain full control over your camera instead of relying on automatic mode.
Everything ties back to the exposure triangle, which is where all three settings come together.