
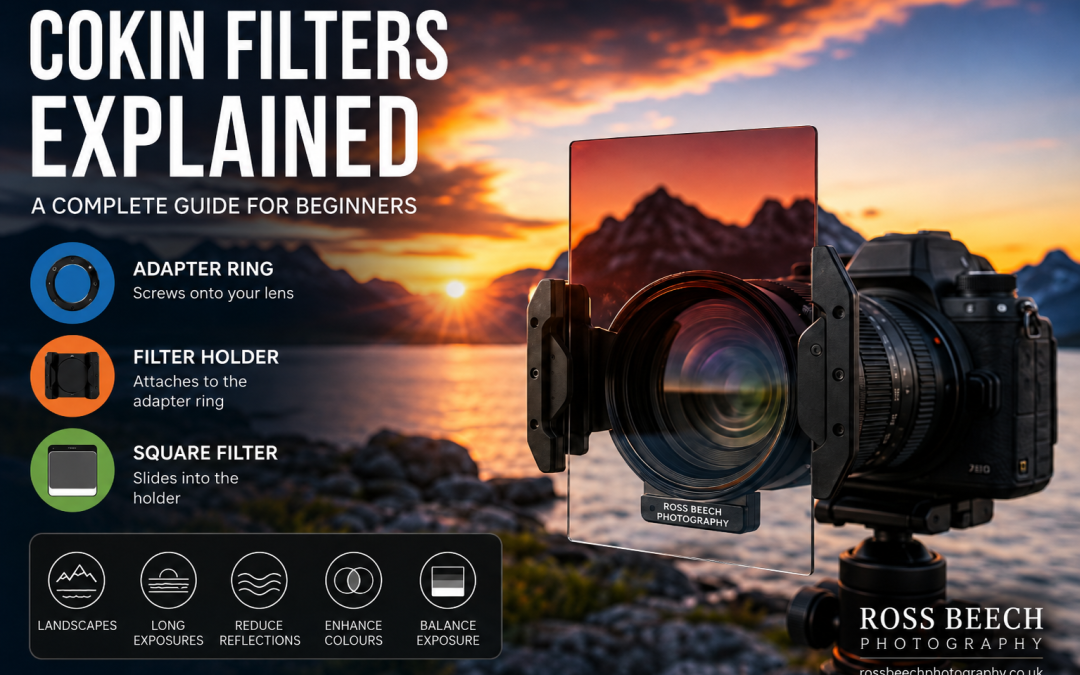
Cokin filters offer photographers a flexible way to control light and create effects without buying a separate filter for every lens. Instead of screwing each filter directly onto the lens, the Cokin filter system uses an adaptor ring, a reusable filter holder and interchangeable square or rectangular filters.
This modular design is especially useful for landscape photography, long exposures and graduated filters because filters can be repositioned, rotated and shared between lenses.
In this beginner’s guide, I’ll explain how Cokin filters work, the different system sizes, the most useful filter types and how to choose the right setup for your camera.
Affiliate disclosure: Some links on this page may be affiliate links. If you make a purchase through them, I may earn a commission at no extra cost to you.
What Are Cokin Filters?
Cokin filters are part of a holder-based photography filter system. A lens-specific adaptor ring screws onto the front of your lens, the filter holder attaches to that ring, and the filter slides into the holder.
The Creative square-filter system was introduced by French photographer Jean Coquin in 1978. The current Cokin Creative filter range includes neutral-density filters, graduated filters, polarisers, colour filters, diffusion filters and optical effects.
The basic setup consists of three parts:
- An adaptor ring that matches your lens thread.
- A filter holder compatible with your chosen Cokin system.
- One or more filters that fit that holder.
The main advantage is that the holder and filters can be reused across multiple lenses. You only need a suitable adaptor ring for each lens diameter.
How Do Cokin Filters Work?
Using Cokin filters is straightforward once you have compatible components. Cokin’s own beginner guide recommends choosing the system first, followed by the holder, adaptor ring and filters.
Step 1: Choose the Correct Cokin Filter System
Choose a system large enough for your biggest lens and wide enough to avoid unwanted dark corners when using wide-angle focal lengths.
It is better to choose the system around your largest or widest lens rather than buying a smaller system that may need replacing later.
Step 2: Find Your Lens Thread Size
Look for the diameter symbol on your lens, such as Ø67mm, Ø72mm or Ø77mm.
This number identifies the adaptor-ring size you require. It is not the focal length of the lens.
For example, a lens marked Ø77mm needs a 77mm adaptor ring compatible with your chosen holder.
Step 3: Attach the Adaptor Ring
Screw the adaptor ring carefully into the filter thread at the front of your lens.
Do not overtighten it. It only needs to be secure enough to support the holder.
Step 4: Attach the Filter Holder
Fit the Cokin holder to the adaptor ring. The holder can normally be rotated, which is useful when positioning graduated filters at an angle.
Step 5: Insert the Filter
Slide the filter into the appropriate slot.
A graduated filter can be moved vertically to place its transition over the horizon, while the holder can be rotated for sloping landscapes.
Cokin Filter Sizes and Systems Explained
Cokin’s Creative range is divided into different physical sizes. The current names are Small, Medium, Large and Extra Large, while many photographers still recognise them by their traditional series names.
| Current size | Traditional name | Approximate filter width | Typical use |
|---|---|---|---|
| Small | A Series | Smaller format | Compact lenses and smaller thread sizes |
| Medium | P Series | 84mm | General DSLR and mirrorless use |
| Large | Z-Pro Series | 100mm | Wide lenses and serious landscape setups |
| Extra Large | X-Pro Series | 130mm | Very large lenses and specialist systems |
Cokin A Series
The A Series is the smallest traditional Cokin system. It can suit smaller lenses, older cameras and photographers who already own compatible A-Series filters.
Its smaller size makes it compact, but it is less suitable for larger lenses or wide-angle photography, where the holder may enter the frame.
Cokin P Series
The P Series uses filters approximately 84mm wide and is one of the most familiar Cokin systems.
It can be a sensible entry point for photographers using standard lenses and moderate wide-angle focal lengths.
However, the P Series is not automatically suitable for every lens. Large front elements, very wide focal lengths and stacked filters can increase the risk of vignetting.
Cokin Z-Pro Series
The Z-Pro system uses 100mm filters.
Its larger size makes it better suited to wide-angle lenses, landscape photography and photographers who want access to the common 100mm filter format.
It is larger and more expensive than the P Series, but it provides more room around the field of view and is a stronger long-term choice for larger lenses.
Cokin X-Pro Series
The X-Pro system uses filters approximately 130mm wide.
It is designed for very large lenses and specialist applications where smaller holders may cause obstruction or vignetting.
Cokin NX Series
The NX Series is Cokin’s more modern premium holder system.
Check compatibility carefully before buying because the holder, frames, filters and adaptor rings need to work together.
Which Cokin Filter System Should You Choose?
For many beginners, the choice will be between the P Series and a 100mm system such as Z-Pro or NX.
Choose the P Series when:
- your lenses are relatively small;
- you want an affordable introduction to square filters;
- you mainly use standard or moderate wide-angle lenses;
- compactness matters.
Choose a 100mm system when:
- you use larger lenses;
- you regularly photograph landscapes;
- you use wide-angle focal lengths;
- you want more room to reposition graduated filters;
- you want a system with greater upgrade potential.
Do not choose only by looking at the lens thread diameter.
Sensor size, focal length, holder depth and the number of stacked filters can all affect whether the holder becomes visible in the corners.
What Types of Cokin Filters Are Available?
“Cokin filter” does not describe one particular effect.
Cokin produces several types of filter for different photographic purposes.
Neutral-Density Filters
A neutral-density filter reduces the amount of light entering the lens without intentionally changing the scene’s colours.
This allows you to use slower shutter speeds in daylight, wider apertures and longer exposures of moving water or clouds.
An ND filter can also let you use a wider aperture in bright conditions without overexposing the image.
These settings work together as part of the exposure triangle in photography.
Keeping the ISO setting low can help preserve image quality during long exposures.
Typical uses for an ND filter include:
- waterfalls;
- rivers and coastlines;
- moving clouds;
- long exposures in busy locations;
- portraits shot at wide apertures in bright light.
Graduated Neutral-Density Filters
A graduated ND filter is dark at one end and clear at the other, with a gradual or more defined transition between the two.
It is primarily used to balance a bright sky with a darker foreground.
Square and rectangular holder systems are especially useful because the filter can be moved up or down to position the transition correctly.
This makes graduated filters particularly useful when applying these landscape photography tips in scenes with bright skies and darker foregrounds.
A soft graduated filter has a gentle transition and often suits uneven horizons containing trees, hills or buildings.
A hard graduated filter has a more defined transition and can work well with flatter horizons, such as the sea.
A reverse graduated filter is darkest near the transition and becomes lighter toward the top. It can be useful when the brightest light is close to the horizon at sunrise or sunset.
Circular Polarisers
A polarising filter can reduce reflections and glare from non-metallic surfaces such as water and glass.
It can also:
- deepen blue skies;
- improve contrast;
- reveal detail beneath water;
- reduce shine on wet leaves and rocks;
- improve colour saturation.
The effect changes as the polariser is rotated.
Be careful with very wide lenses because a polariser can make different parts of a wide sky appear uneven.
Colour Filters for Black-and-White Photography
Coloured filters change how colours are converted into shades of grey.
For example:
- yellow can gently increase contrast;
- orange can darken blue skies more strongly;
- red can create dramatic separation between clouds and sky;
- green can lighten some foliage tones.
These filters are especially useful for black-and-white film photography, although similar adjustments can often be made during digital editing.
Graduated Colour Filters
Graduated colour filters add colour to part of the image while leaving the other area comparatively clear.
They can be used to:
- intensify a sunset;
- add blue to a pale sky;
- create a warmer or cooler mood;
- produce effects directly in-camera.
These filters should be used carefully because strong effects can look artificial.
Diffusion and Portrait Filters
Diffusion filters soften fine detail and highlights.
They can create a gentler appearance for portraits or produce a glowing effect around bright areas.
The effect is difficult to remove completely afterwards, so it is sensible to take both filtered and unfiltered versions.
Star and Optical-Effect Filters
Star filters turn bright points of light into multi-point star shapes.
They can be used with:
- streetlights;
- candles;
- reflected sunlight;
- night-time city scenes;
- festive lighting.
These filters are creative rather than corrective tools, so use them selectively.
Centre-Spot Filters
Centre-spot filters keep the central subject clearer while softening or altering the surrounding area.
They can be used for portraits, still-life images and deliberately stylised photography.
Cokin Filters vs Screw-In Filters
Both systems have advantages.
Advantages of the Cokin Filter System
- Filters can be shared between several lenses.
- Graduated filters can be repositioned.
- The holder can be rotated.
- Multiple filters can sometimes be combined.
- You only need a different adaptor ring for each lens size.
- Rectangular filters give more freedom when positioning transitions.
Disadvantages of the Cokin Filter System
- It is bulkier than a single screw-in filter.
- Holders can cause vignetting on wide lenses.
- More components need to be carried.
- Strong side light may enter around some holder setups.
- Stacking filters can reduce image quality or create colour casts.
- Resin filters can be easier to scratch than protected screw-in filters.
Advantages of Screw-In Filters
- Compact and quick to attach.
- Easy to carry.
- Convenient for a polariser or everyday filter.
- Often better sealed around the lens.
Disadvantages of Screw-In Filters
- A separate size may be required for each lens.
- Circular graduated filters cannot be repositioned vertically.
- Stacking several rings can cause vignetting.
- Buying several high-quality filters in different sizes can become expensive.
Can You Stack Cokin Filters?
Many Cokin holders allow more than one filter to be fitted, but stacking should be done carefully.
Combining filters can increase:
- vignetting;
- flare;
- reflections;
- colour cast;
- loss of contrast;
- the chance of the holder appearing in the corners.
Only stack filters when the combination has a clear purpose.
More filters do not automatically create a better image.
How to Avoid Vignetting When Using Cokin Filters
Vignetting appears as darkening in the corners of the photograph.
To reduce it:
- choose a holder large enough for your widest lens;
- avoid unnecessary step-up rings;
- avoid stacking too many filters;
- check the frame at your widest focal length;
- consider a wide-angle holder or larger system;
- test the system before an important shoot.
How to Use Cokin Graduated Filters
- Compose your photograph without the filter.
- Set the camera on a tripod.
- Attach the adaptor ring and holder.
- Slide the graduated filter into the holder.
- Look through the viewfinder or use live view.
- Move the filter until the transition matches the horizon.
- Rotate the holder if the horizon is angled.
- Take a test image and examine the histogram.
- Adjust the filter position or exposure if needed.
How to Use Cokin ND Filters for Long Exposures
- Mount the camera securely on a tripod.
- Compose and focus before fitting a very dark filter.
- Switch to manual focus if necessary.
- Record the unfiltered shutter speed.
- Insert the ND filter.
- Calculate or meter the adjusted exposure.
- Take the exposure using a remote release or self-timer.
- Check sharpness, highlights and colour.
- Adjust the exposure if needed.
Shooting in RAW gives you more flexibility when adjusting exposure afterwards, as explained in my RAW vs JPEG photography guide.
I also use full-frame equipment in my Nikon D610 review, where filters can be especially useful for landscape and long-exposure work.
Common Cokin Filter Mistakes to Avoid
Buying the Wrong Adaptor Ring
The adaptor ring must match both your lens thread and the selected Cokin system.
Choosing a Holder That Is Too Small
A smaller system may appear cheaper but can cause vignetting or become unsuitable when you upgrade lenses.
Confusing Thread Size With Focal Length
A 77mm filter thread does not mean the lens has a 77mm focal length.
Look for the Ø symbol on the lens.
Positioning a Graduated Filter Too Low
This can darken mountains, buildings and trees along with the sky.
Using Too Many Filters
Stacking filters unnecessarily can increase flare, reduce contrast and introduce unwanted colour.
Leaving Gaps Around a Strong ND Filter
Light entering between the filter and holder can affect long exposures.
Check that the filter is fitted correctly and that any light-blocking gasket is positioned properly.
Buying Without Checking Compatibility
Cokin has produced several holder generations and system sizes.
Do not assume every older filter, modern holder and adaptor ring will fit together.
Are Older Cokin Filters Still Usable?
Many older filters can still be useful when they are in good condition and fit a compatible holder.
Before using an older filter, check for:
- scratches;
- warping;
- fading;
- damaged corners;
- surface haze;
- strong colour cast;
- correct holder fit;
- light leaks.
Older A-Series and P-Series components may sometimes be adapted, but additional rings can move the holder farther from the lens and increase vignetting.
Are Cokin Filters Worth It?
Cokin filters can be worth considering when you want a flexible holder system that works across several lenses.
They are especially useful for:
- landscape photographers;
- long-exposure photography;
- graduated filters;
- photographers with several lens diameters;
- people who enjoy creating effects in-camera.
They may be less suitable when you only want one polariser for one lens or prefer the smallest possible setup.
Recommended Cokin Filter Kits for Beginners
A starter kit can be more economical than buying the holder and filters separately.
Before ordering, check that the kit matches your chosen Cokin system and that you have the correct adaptor ring for your lens.
- Best affordable option: Cokin P Series starter kit
- Best for serious landscape photography: Cokin Z-Pro or 100mm kit
- Best premium option: Cokin NX Series kit
For another retailer overview of the different systems, see this Cokin filter buying guide.
Frequently Asked Questions About Cokin Filters
What Size Cokin Filter Do I Need?
Choose a system based on your widest and largest lens, not only your smallest current lens.
The P Series can suit many standard setups, while a 100mm system is generally a safer choice for larger or wider lenses.
Can Cokin Filters Fit Any Lens?
They can fit many threaded lenses when the correct holder and adaptor ring are available.
Lenses with curved front elements or no standard filter thread may need specialist adaptors.
Can I Use One Cokin Holder on Several Lenses?
Yes.
Use a separate compatible adaptor ring for each lens-thread size while keeping the same holder and filters.
Are Cokin Filters Made From Glass?
Not all of them.
Many Creative filters use CR39 resin, while other premium filter ranges may use different materials.
What Is the Best Cokin Filter for Waterfalls?
An ND filter is usually the most useful because it allows a slower shutter speed.
The required strength depends on the light level and the amount of motion blur you want.
Which Cokin Filter Is Best for Sunsets?
A graduated ND filter can balance the bright sky with the darker land.
A reverse graduated ND filter can be useful when the strongest light is concentrated near the horizon.
Can I Use a Polariser and an ND Filter Together?
Yes, when your holder supports the combination.
Watch for vignetting, colour shifts and uneven polarisation with wide-angle lenses.
Are Square Filters Better Than Circular Filters?
Neither is always better.
Square and rectangular filters provide more positioning flexibility, especially for graduated filters.
Screw-in filters are generally more compact and convenient.
Do Cokin Filters Affect Image Quality?
Any filter can affect image quality.
Clean, undamaged filters used correctly should produce better results than scratched, dirty or heavily stacked filters.
Final Thoughts
The Cokin filter system remains attractive because it separates the filter from the lens diameter.
Once you have selected a suitable holder size, the same filters can be used across several lenses with different adaptor rings.
For beginners, the most important decision is choosing a system large enough for your widest lens and making sure the holder, adaptor ring and filters are mutually compatible.
Start with practical filters such as an ND, graduated ND and polariser.
Learn how each affects exposure and reflections before adding creative filters.