Introduction
Shutter speed is one of those camera settings that looks simple at first, but actually has a big impact on your photos.
When I first started learning photography, shutter speed was the one that confused me the most after aperture.
But once you understand it, it becomes one of the most useful tools for controlling how your images look.
In simple terms:
Shutter speed controls how long your camera sensor is exposed to light.
It affects two main things:
- brightness of your image
- how motion is captured (freeze or blur)
If you’re learning photography basics, this connects closely with:
All of these work together to create your final image.
What is shutter speed in photography?
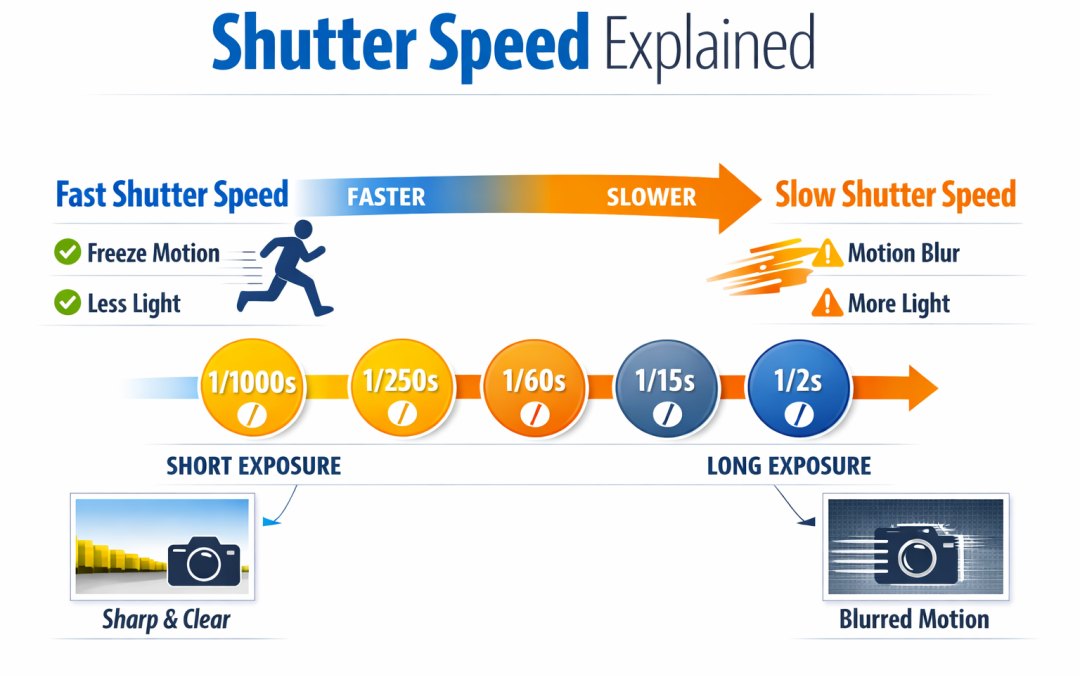
Shutter speed is the amount of time your camera’s shutter stays open when taking a photo.
Think of it like a door:
- A fast shutter speed = door opens and closes quickly
- A slow shutter speed = door stays open longer
Common shutter speeds:
- 1/1000
- 1/500
- 1/250
- 1/60
- 1/30
- 1 second or longer
How shutter speed affects your photos
Shutter speed controls two important things:
1. Motion (freezing or blurring)
- Fast shutter speed → freezes motion
- Slow shutter speed → creates motion blur
Examples:
- 1/1000 → freezes sports action
- 1/60 → normal handheld photos
- 1 second → motion blur like light trails
2. Brightness
- Fast shutter → less light enters → darker image
- Slow shutter → more light enters → brighter image
This is why shutter speed affects exposure heavily.
Simple shutter speed examples
Here’s how I think about it:
- 1/1000 → sports, fast action
- 1/500 → general outdoor movement
- 1/250 → everyday photography
- 1/60 → safe handheld limit
- 1/30 or slower → motion blur starts
- 1+ seconds → long exposure photography
When to use a fast shutter speed
Use a fast shutter speed when you want to freeze motion.
Best for:
- sports photography
- wildlife photography
- action shots
- children or pets
When to use a slow shutter speed
Use a slow shutter speed when you want motion blur or more light.
Best for:
- night photography
- light trails
- waterfalls
- creative motion blur
Shutter speed and the exposure triangle
Shutter speed works with:
- aperture
- ISO photography explained
If you change shutter speed:
- faster shutter → you may need higher ISO or wider aperture
- slower shutter → you may need lower ISO or narrower aperture
This balance is what gives you full exposure control.
Common beginner mistakes with shutter speed
1. Using too slow shutter speed handheld
This causes blurry images from camera shake.
2. Not adjusting ISO or aperture
Changing shutter speed without balancing exposure leads to under or overexposed images.
3. Confusing motion blur with bad focus
Sometimes blur is caused by slow shutter speed, not focus issues.
Shutter speed in real photography situations
- Sports → 1/500 to 1/2000
- Street photography → 1/125 to 1/500
- Portraits → 1/100 to 1/250
- Night photography → 1 second+
- Landscapes → depends on style (fast or long exposure)
Shutter Speed and Image File Formats
Shutter speed mistakes can sometimes be fixed in editing, especially if you’re shooting in RAW rather than JPEG.
- RAW gives you more flexibility to recover exposure
- JPEG is less forgiving if your shutter speed was wrong
You can read the full guide here: RAW vs JPEG photography
Best shutter speed settings for beginners
If you’re just starting out:
- use shutter priority mode (S or Tv mode)
- keep above 1/125 for handheld shots
- increase ISO if image is too dark
- experiment with motion blur creatively
Final thoughts
Shutter speed is one of the most powerful creative tools in photography.
It doesn’t just control brightness — it controls how time is captured in your image.
Once you combine shutter speed with:
you start to fully understand how your camera works instead of guessing settings.